
Restauration du système est une fonction très importante et utile dans le système Windows. Elle suit les installations de logiciels, les modifications de pilotes et les mises à jour logicielles, et permet à un utilisateur de revenir à son état précédent si quelque chose d’inattendu se produit. L’enregistrement créé par le service de Restauration du système est appelé points de restauration du système. Windows crée automatiquement des points de restauration une fois par semaine.
Sous Windows 10 & 11, ce service est toujours disponible et pleinement fonctionnel. Cependant, cette fonctionnalité est désactivée par défaut, ce qui signifie que vous ne pourrez pas l’utiliser pour la restauration du système si vous n’avez pas changé le paramètre par défaut en l’activant manuellement au préalable.
Vous pouvez suivre les étapes ci-dessous pour activer et créer un point de restauration dans Windows 10 & 11 :
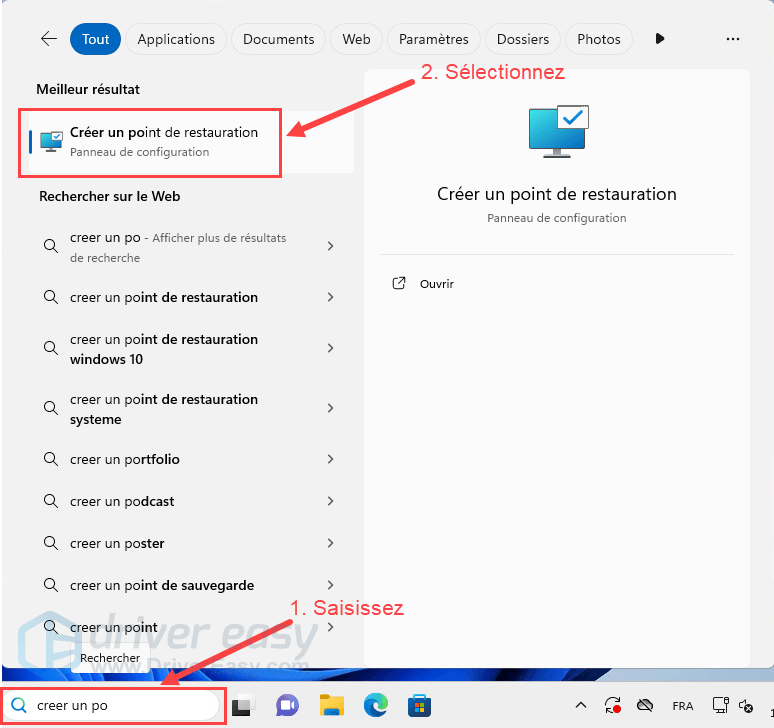
1) Sur votre clavier, appuyez sur la touche logo Windows et tapez point de restauration. Sélectionnez Créer un point de restauration dans la liste des résultats.
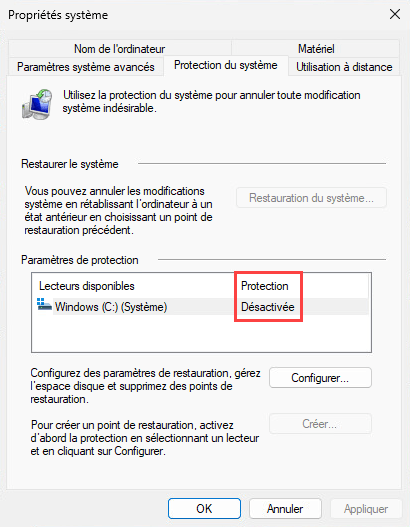
La fenêtre des Propriétés Système apparaîtra. Sous l’onglet de protection du système, le statut de la Protection devrait être Désactivé si vous n’y avez rien fait auparavant.
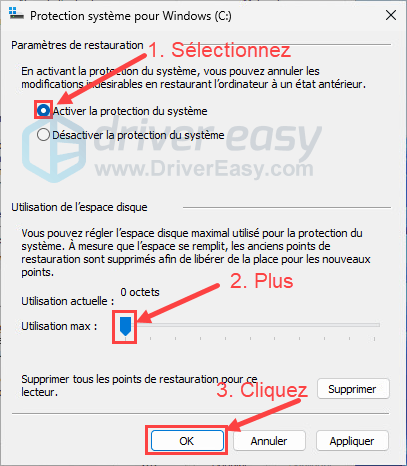
3) Sous l’onglet Protection du système, cliquez sur Configurer.

4) Sélectionnez Activer la protection du système. Ensuite, déplacez le curseur à côté de Utilisation maximale pour décider de la quantité de votre disque dur que vous souhaitez utiliser pour stocker les points de restauration. (En général, 5 % à 10 % suffisent.) Cliquez sur OK pour enregistrer les modifications.
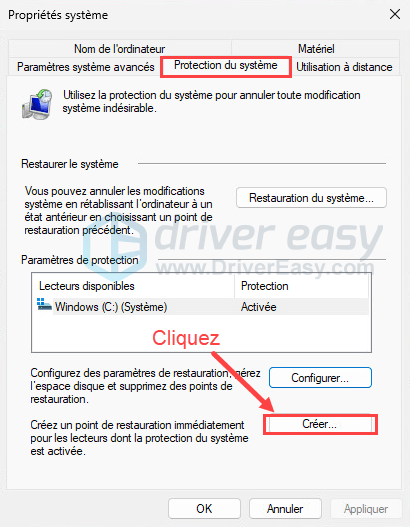
5) Vous pouvez créer manuellement un point de restauration maintenant en revenant à la fenêtre Propriétés système. Sous l’onglet Protection du système, cliquez sur le bouton Créer.
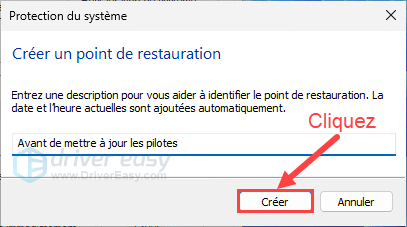
6) Nommez ce point de restauration et cliquez sur Créer pour continuer.
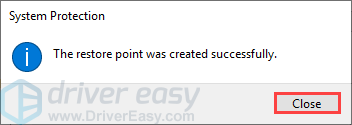
7) Cliquez sur Fermer une fois le point de restauration créé avec succès.